Fine-tuning of Exposure Time
Objective: Adjust the initial exposure time to ensure optimal adaptation of printed structures.
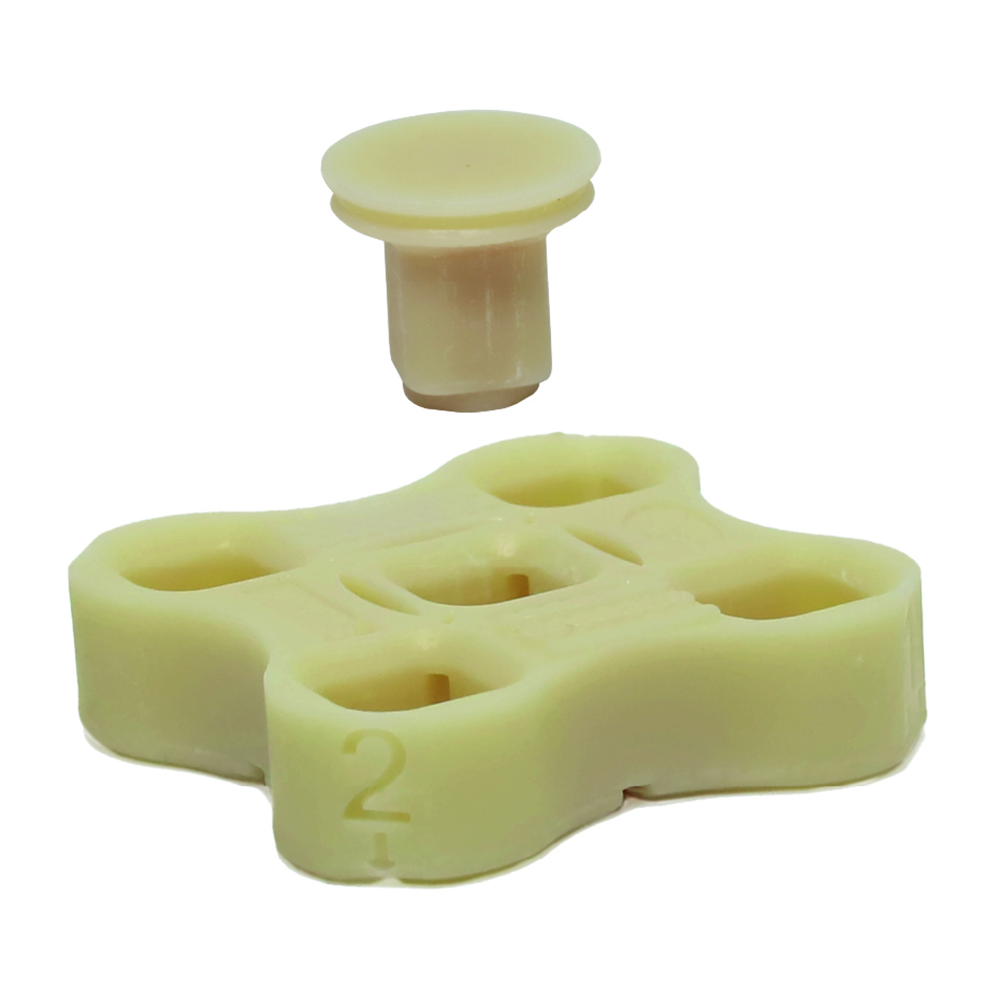
New Stetic designed a test piece that simulates the adaptation of a Geller die on a working model. This test specimen consists of two parts: a structure with 5 holes, numbered on its walls for identification, and a die for conducting the insertion test (Figure 3).
Figure 3. Scoring PORTUX Test Piece.
What needs to be done? Print the Scoring PORTUX test specimen using the initial exposure time defined in the first stage (2 seconds in the example above).
How is the test specimen evaluated? If the exposure time used to print the test specimen is ideal, the die should fit better in the center hole (with less rotation and better seating) than in the outer holes. In case the die fits better in a hole other than the center one, the initial exposure time should be modified as follows:
- If the die fitted in hole 1 ↓↓: decrease the exposure time by 15 – 20%.
- If the die fitted in hole 2 ↓: decrease the exposure time by 5 – 10%.
- If the die fitted in hole 4 ↑: increase the exposure time by 5 – 10%.
- If the die fitted in hole 5 ↑↑: increase the exposure time by 15 – 20%.
- If the die does not fit in any hole, substantially decrease the exposure time.
The printing of the Scoring PORTUX Test Specimen should be repeated until the exposure time ensuring the perfect adaptation of the die in the central hole is found.
IMPORTANT: The print must be cleaned in ethanol or isopropanol for 10 minutes (preferably in an ultrasound bath), post-cured for the time defined by the resin manufacturer, and wait for the test specimen to cool before inserting the pieces.